
Nested categories help you organize your documentation into a clear, structured sidebar, making it easier for users to find what they’re looking for. By using parent and child categories, you can group related documents under logical sections (for example, a main “Get Started” section with sub-sections like “Basics” or “API”). PinkDocs automatically reflects this hierarchy in the sidebar, so when categories are set up correctly, your documentation stays clean, scalable, and easy to navigate as it grows.
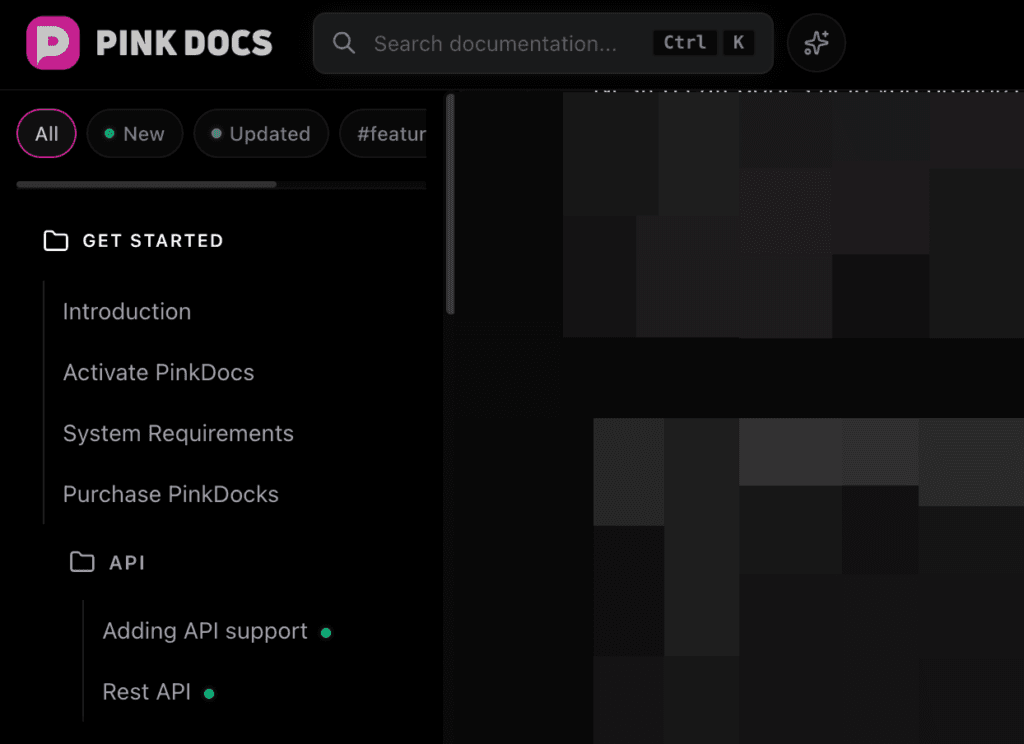
What “nested categories” mean in the sidebar
- Parent category → shown as a main section
- Child category → shown indented under the parent
- Documents appear under their assigned category
Example:
Get Started
 ├─ Basics
 ├─ Installation
 └─ API
     ├─ Authentication
     ├─ Endpoints
     └─ Errors
How To Add Nested Category
You can create nested categories directly from the Document Editor by either adding a child category under an existing category or by creating a new category and assigning a parent to it. Once a parent is selected, PinkDocs automatically treats it as a nested category and reflects the hierarchy in the sidebar for better organization and navigation.
- Open any document in the Document Editor
- Go to the right sidebar → Categories
- Click Add New Category
- Enter the category name
- From Parent Category, select an existing category (or leave it as None to create a top-level category)
- Click Add New Category
- Assign the document to the newly created child category
- Click Save
When saving the document, make sure you select only the nested (child) category and not the parent category. Selecting both the parent and child categories will cause the document to appear in both sections in the sidebar, which can lead to duplication and a cluttered navigation experience.

Nested categories can be created directly from the Document Editor by assigning a parent category to a new or existing category. Once set, PinkDocs automatically reflects this hierarchy in the sidebar.
\